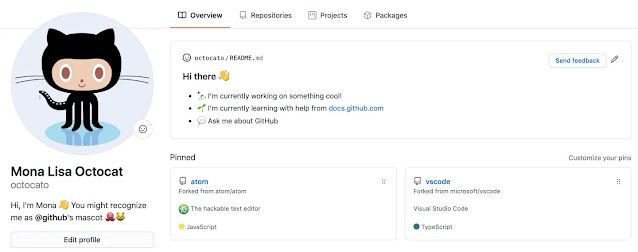
Crafting an appealing GitHub README with images can significantly boost the visibility and user engagement of your project. In this step-by-step guide, you'll learn how to create an attractive README for your GitHub project while optimizing it for SEO (Search Engine Optimization).
Step 1: Choose a Text or Markdown Editor
The first step in creating an enticing GitHub README is selecting the right text or Markdown editor. Markdown is a lightweight markup language that allows you to format your document with ease. Popular Markdown editors like Visual Studio Code, Typora, and Dillinger can help streamline the process.
Step 2: Create a New README.md File
Begin by navigating to your GitHub repository's root directory and clicking the "Add file" button. Select "Create new file" and name it "README.md" to indicate that it's a Markdown file.
Step 3: Craft a Compelling Title and Description
Your GitHub README should kick off with an attention-grabbing title, displayed as a large heading:
# My Awesome Project
Complement the title with a concise description, explaining the project's purpose and benefits:
A powerful and user-friendly tool for [insert purpose].
Step 4: Table of Contents (Optional)
For longer READMEs with numerous sections, consider including a table of contents to facilitate user navigation. Each section can be linked for easy access:
## Table of Contents
- [Description](#description)
- [Installation](#installation)
- [Usage](#usage)
- [Features](#features)
- [Screenshots](#screenshots)
- [Contributing](#contributing)
- [License](#license)
Step 5: Installation Instructions
Elaborate on the process of installing and configuring your project, including any prerequisites. Employ code blocks to showcase installation commands:
## Installation
1. Clone the repository: `git clone https://github.com/yourusername/yourproject.git`
2. Change directory: `cd yourproject`
3. Install dependencies: `npm install`
Step 6: Usage
Provide detailed instructions on how users can effectively utilize your project. Make it accessible to both experienced and novice users by incorporating code snippets, visuals, or sample commands:
## Usage
To use this project, follow these steps:
1. Run `python app.py` to start the application.
2. Open a web browser and navigate to `http://localhost:5000`.
3. Enjoy the awesome features!
Step 7: Features and Screenshots
If applicable, highlight your project's key features and functionalities. Enhance user engagement by incorporating screenshots to visually illustrate these features:
## Features
- Feature 1: [Description](screenshots/feature1.png)
- Feature 2: [Description](screenshots/feature2.png)
Ensure you've uploaded the screenshots to a folder named "screenshots" within your repository and provide relative image URLs.
Step 8: Contributing Guidelines
Inspire and welcome contributions from the community by offering clear guidelines on how others can contribute to your project:
## Contributing
We welcome contributions from the community! To contribute to the project, follow these steps:
1. Fork the repository.
2. Create a new branch: `git checkout -b feature/your-feature`
3. Make your changes and commit them: `git commit -m 'Add a new feature'`
4. Push to your fork: `git push origin feature/your-feature`
5. Create a pull request.
Step 9: License Information
Specify your project's license to guide users on how they can utilize and distribute your code:
## License
This project is licensed under the [Your License Name] - see the [LICENSE.md](LICENSE.md) file for details.
Step 10: Preview and Save
Before saving your README, ensure the formatting is accurate. Employ a Markdown preview tool to confirm its appearance. After validation, commit the changes to your repository.
Step 11: Review and Update
Regularly review and update your README to keep it current as your project evolves. Respond to user feedback, introduce new features, and maintain the documentation. Crafting an enticing GitHub
README is an ongoing endeavor.
By following these steps, you can produce a captivating GitHub
README enriched with images and optimized for search engines. This comprehensive guide ensures your project gains the attention it deserves and engages a broader audience.

Comments
Post a Comment